Creating a Meaningful Travel Journal
Summer travel is getting underway! Do you have a fun trip planned for the months ahead? We are looking forward to getting away this summer. Whether you are keeping your trips close to home or planning a trip overseas, it is wonderful to collect your travel memories in one place. Today we’re discussing how you can use our notebooks to create a fun and meaningful travel journal. Our notebooks work wonderfully as a dedicated travel journal. Here are some of our favorite tips for setting yours up!
Cover & Fill Page
After selecting your cover, customize your first page in the Fill Page section. If you have a favorite travel quote, this is a perfect place to put it. As you travel, save stickers, tags, ticket stubs, and mementos. You can use these to glue inside your cover or throughout your pages. You can also record miles traveled and states/countries visited inside the cover.
Layouts
Select the layout you will use as the base of your notebook. This will make up the middle section of your notebook, and depending on how many different pages you add to the beginning and end, this section typically makes up the bulk of the notebook. Lined, Grid, or Dot are all great choices here. These pages give you ultimate flexibility to be creative. Give all family members room to journal and record their thoughts/doodles. Dedicate a lined section to jot down funny quotes, lines, and inside jokes from the trip. If you have young kids, consider the Half Lined style. This provides kids a place to journal and draw pictures!
+Pages
Travel Pages
The Travel layout is perfect for recording main details of the trip. We like to include this in the front of the notebook. This is a great page to use as you plan and pack for your trip. Consider how many trips this notebook will cover. Generally 6-10 travel pages should be sufficient.
Bucket List
The Bucket List layout is a fun one to include. Here you can record your activities, restaurants, outings, and ratings. This layout can work for multiple trips. We recommend 3-4 pages and like to include them at the end of the notebook.
Budget & Expenses
Both of these layouts can be helpful for tracking your expenses during the trip. The Budget layout is wonderful to use while planning your trip. We like the lined page next to it for brainstorming and mapping out our trip as we plan an upcoming adventure. Add these into the front of your notebook.
Story Board 2 & 3
These layouts are a fun place to include photos, drawings, and captions. Do your kids love graphic novels? Challenge them to create a comic of your trip on the Story Board 2 layout! If you want to print small versions of your photos to glue on the pages, a quick Google search will provide many sites for printing photos from your computer or Instagram account. We recommend 6-10 Story Board pages at the end of the notebook.
Groceries and Meals
Renting a house or camping on your next trip? Consider the Groceries and Meals layout to plan your trip meals. We recommend 5-8 pages and like to include them in the front of the notebook.
Get Creative!
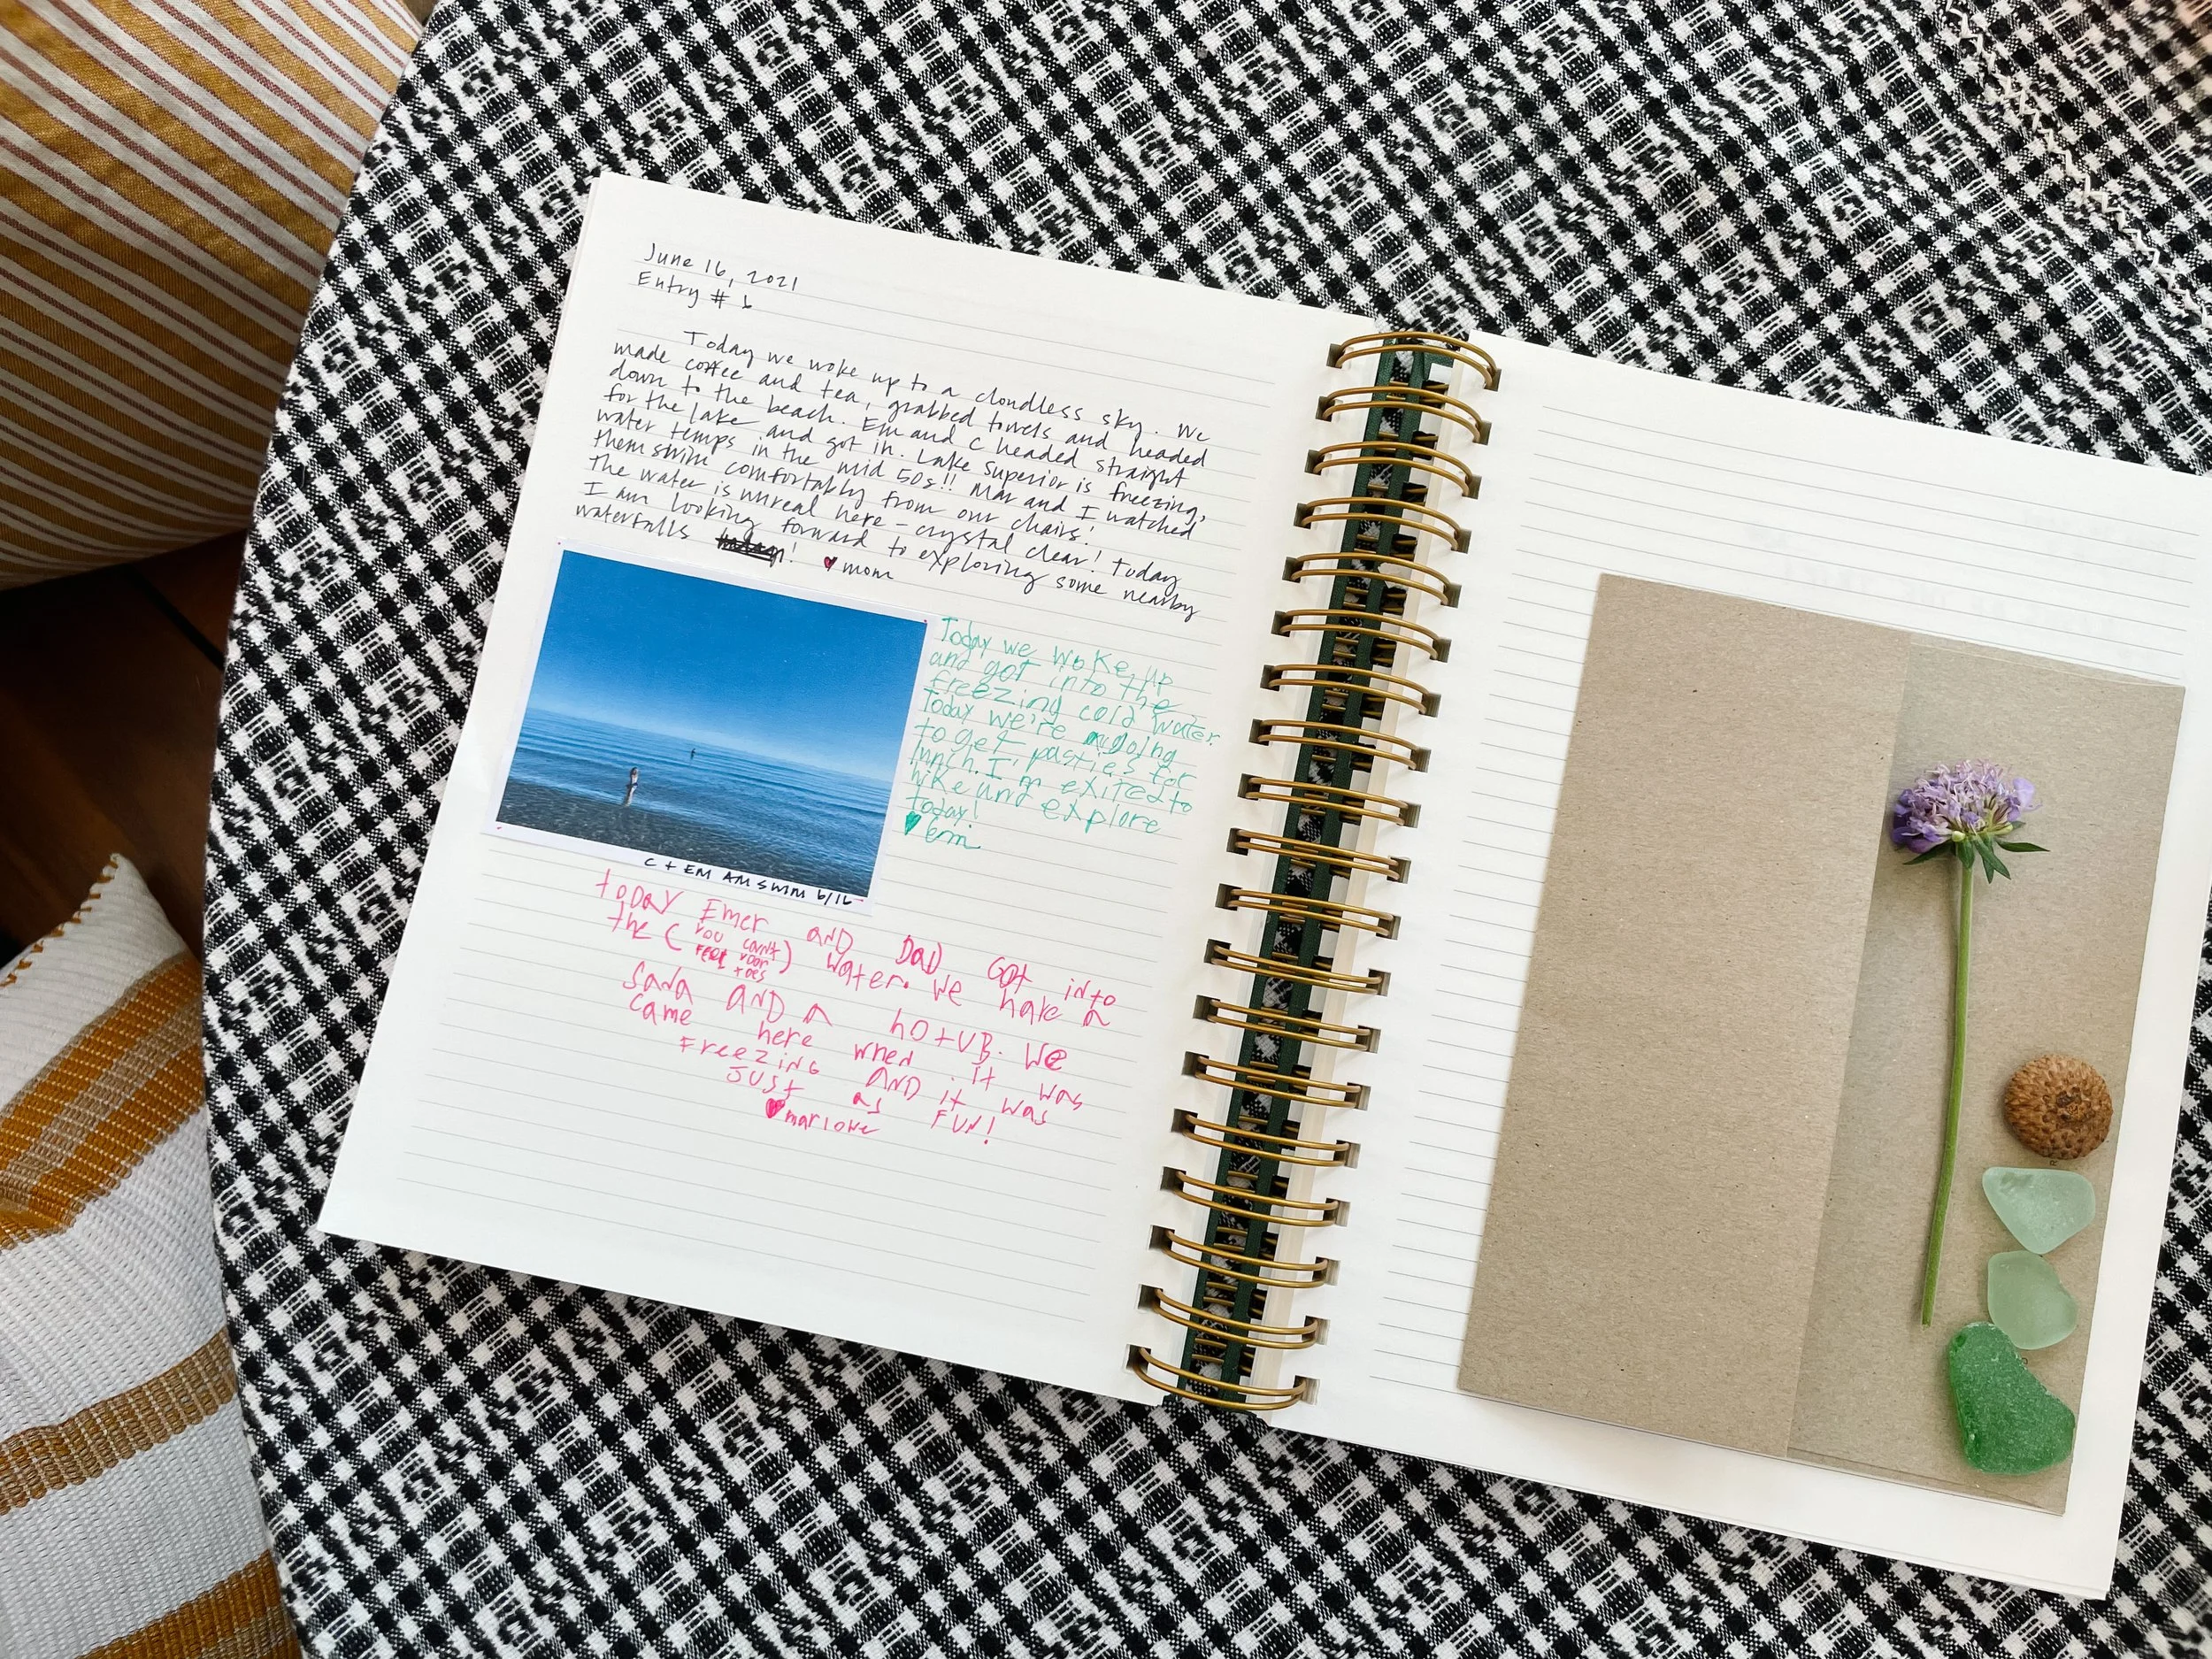
The more details you can include in your travel notebook, the more fun it will be to look back on later! Imagine sorting through the details of your grandparents or great-grandparents’ travel. Even receipts can be a treasure some day down the line! Pressed flowers, maps, stickers, menus, postcards, ribbon, and envelopes glued inside to stash items, are all fun to consider including. For helpful tips on moving the +Pages around in your notebook, check out this video.
Safe travels no matter where you head this summer! And keep us posted if you create your own travel journal!